Designing and Prototyping a Full-Body 3D Scanner
👬 Team: Hyun Kang
👨🏻💻 Role: Solo Project
📅 Date: Dec 2021 - Mar 2022
Summary
I designed and made a prototype of a full-body 3D scanner by myself using only about $2,000. With the reconstructed mesh, I also developed a pipeline to segment body and clothes.
Procedure
1. Self-Study
Since I was new to this field and had no idea how actual 3D reconstruction works, I first had to self-study to get an idea of how to start. For this, I used two learning materials: 1. First Principles of Computer Vision; 2. Multiple View Geometry in Computer Vision. I watched the whole series of videos and read books for what I did not understand.
2. Planning the Hardware
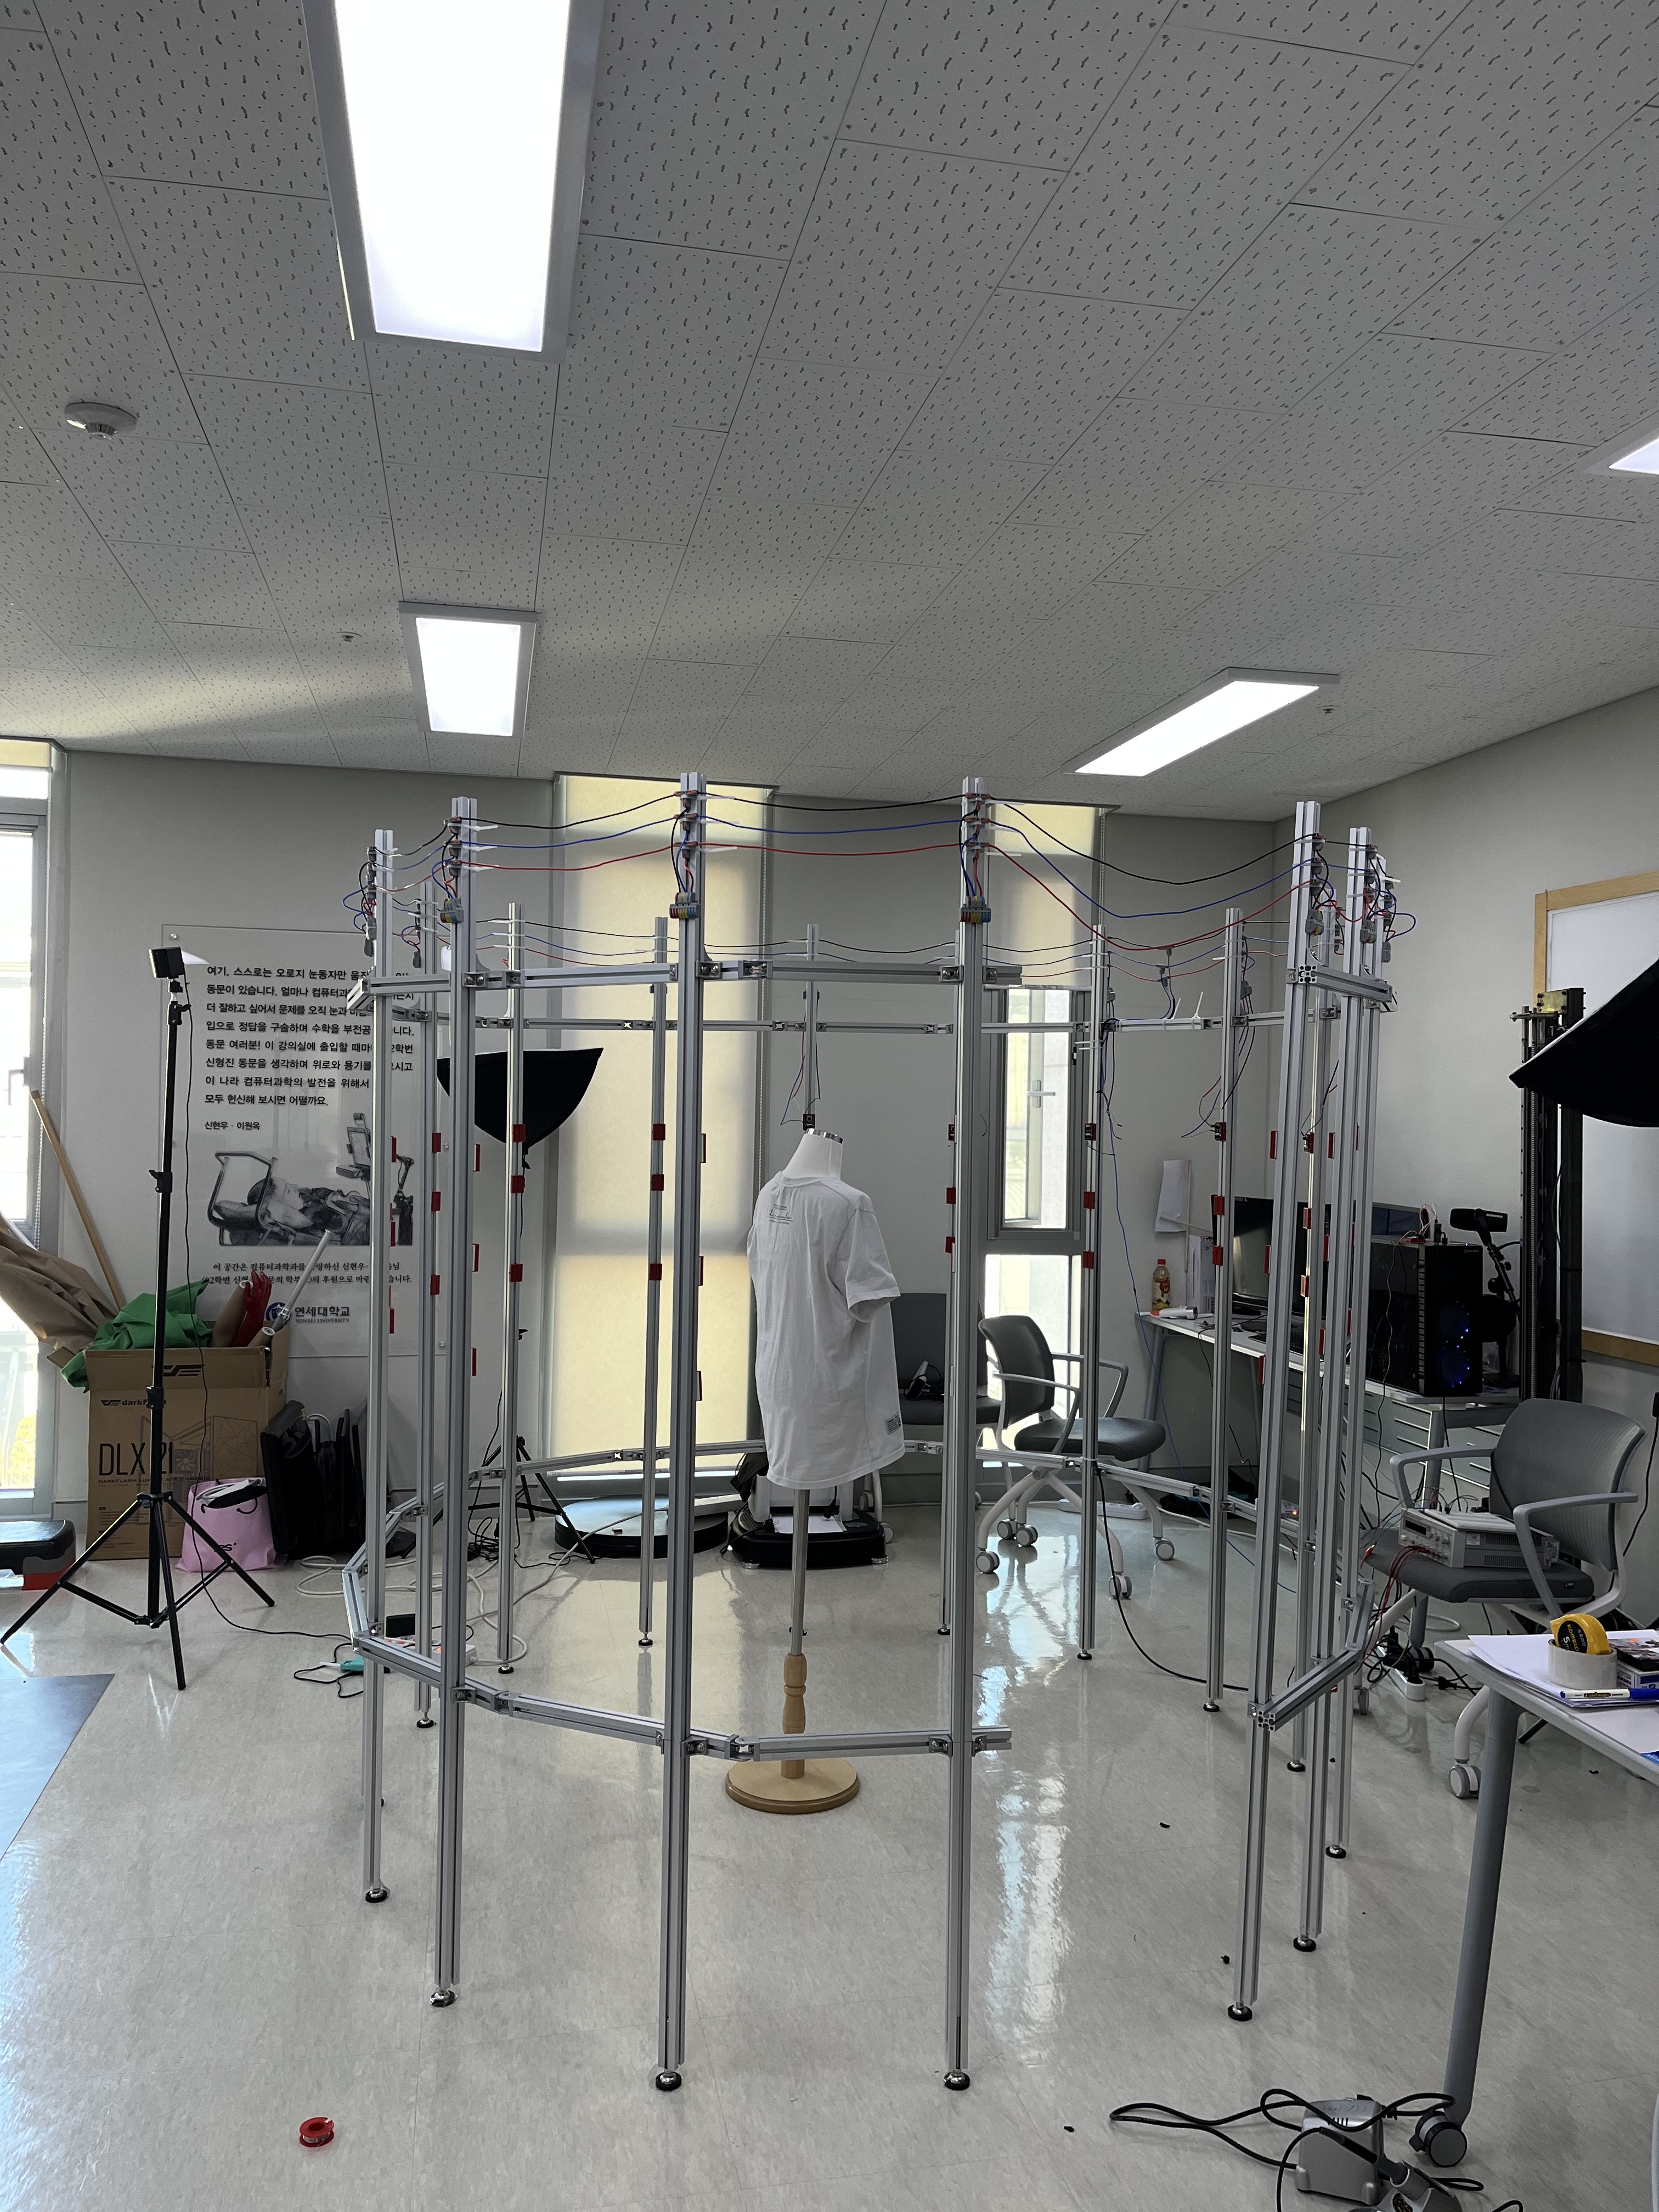
Since the budget was extremly low ($2,000), I had almost no option for the camera. I had to use ESP32-Cam modules and profiles for the frameworks. Since the camera has focal length of 4.2mm and the height of the lens was 2.7mm, in order to capture about 80cm of human body, the camera had to set 1.3m apart from the center. The calculation was done using magnification and thin lens formula.
Next, I had to decide how many cameras to install and how closely they should be placed together. The answer could be found in SIFT (Scale-Invariant Feature Transform). 3D reconstruction heavily relies on feature extraction. Once features are extracted, key steps such as camera calibration can be performed, and epipolar geometry can be inferred. SIFT extracts interest points using Difference of Gaussians (DoG) and filters them to find the final keypoint descriptors. Although the algorithm is robust to scale and rotation, it is vulnerable to changes in view, which cannot be avoided in a 3D scanning setup. Therefore, I decided to place the cameras as closely as possible to capture different views. For full 360-degree coverage, I installed about 30 cameras.
3. Building the Hardware
This was the hard part as I had to do it myself. I connected the profiles to build the frame work and have about 60 cameras installed (wiring and soldering was a nightmare 💀). All the cameras were connected together through wires and when a voltage was send to one of their I/O, the photo was taken and sent to the server as they could be connected to the wifi.
4. Software Test
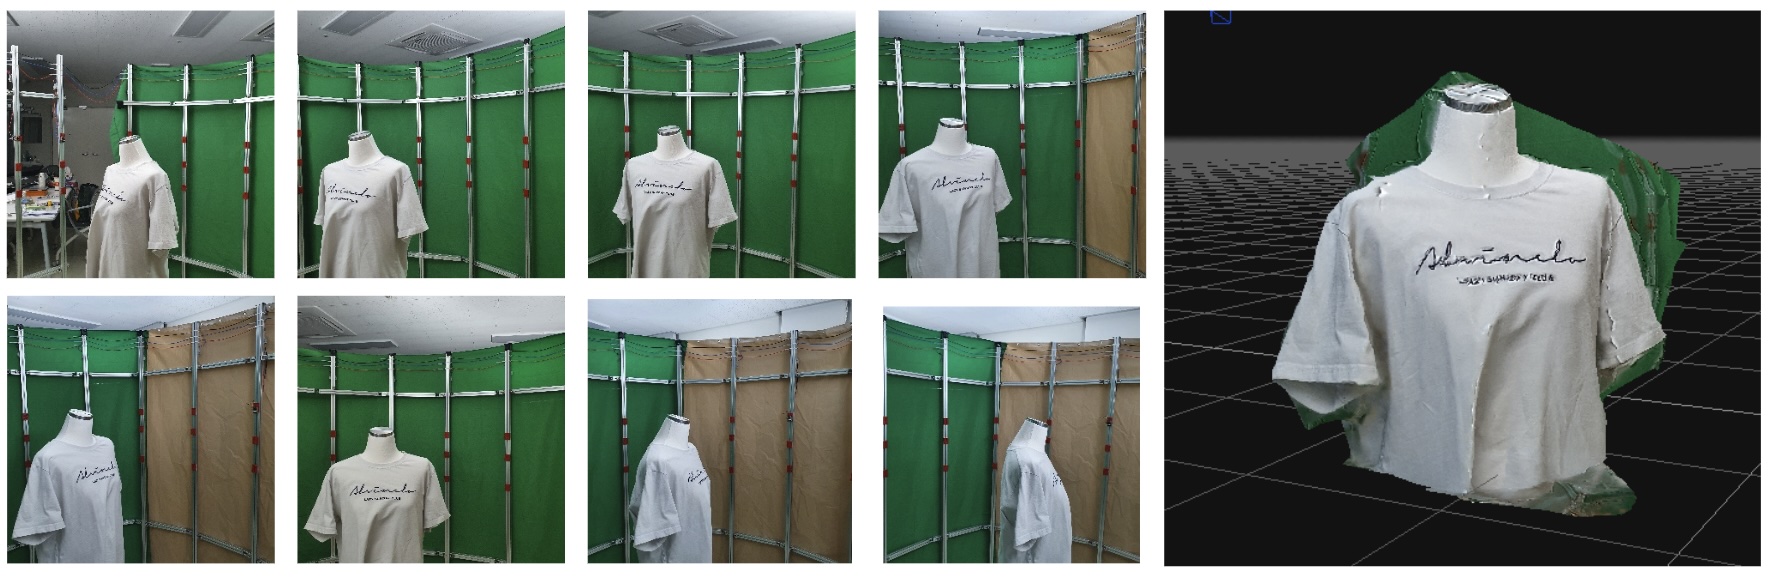
The actual reconstruction was done using the commercial software 3D Zephyr. However, our initial attempt to take photos was unsuccessful due to varying image quality among different cameras and the low dynamic range of the cameras, which made feature extraction difficult for plain objects, such as a man wearing an off-white t-shirt. This issue was later alleviated by using artificial markers on the clothes, which aided feature extraction and could be removed during post-processing. Additionally, we applied white-balancing to improve image consistency. Although the course material covered about other important concepts such as camera calibration and structure from motion, they did not explictly used in this project.
5. Segmentation
Once the 3D avatar was obtained, we used a pre-trained image-based clothes-segmentation model to differentiate between the body and clothing. The avatar was first rendered from different views, and these images were then processed by the model. Using the camera extrinsics and intrinsics information from the rendering process, we matched the pixel-wise segmentation results to the mesh vertices. This enabled us to achieve segmentation of the mesh itself.
Exploring the future, one post at a time.